Steps to view, edit, and synchronize your website files using FileZilla and password authentication
This article uses Filezilla as an example, but most FTP clients work similarly. The only requirement is that your client supports SFTP – but most of them actually do.
Setting up FileZilla
Assuming you want to use FileZilla, please visit https://filezilla-project.org/ and download FileZilla Client for your operating system. Install the software and open it afterwards.
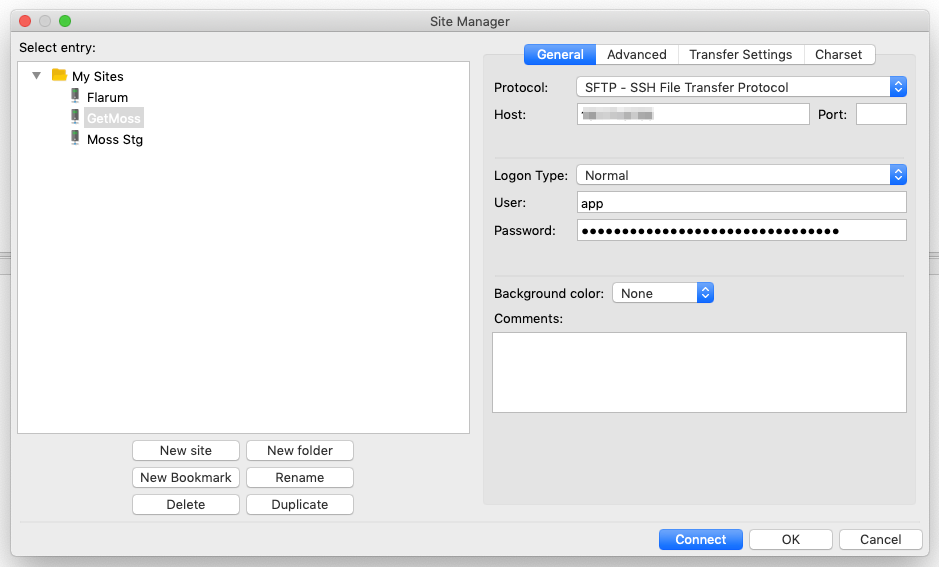
- Click File → Site Manager
- Click New Site and give it the name of your site
- Fill out the following items:
- Protocol: SFTP – SSH File Transfer Protocol
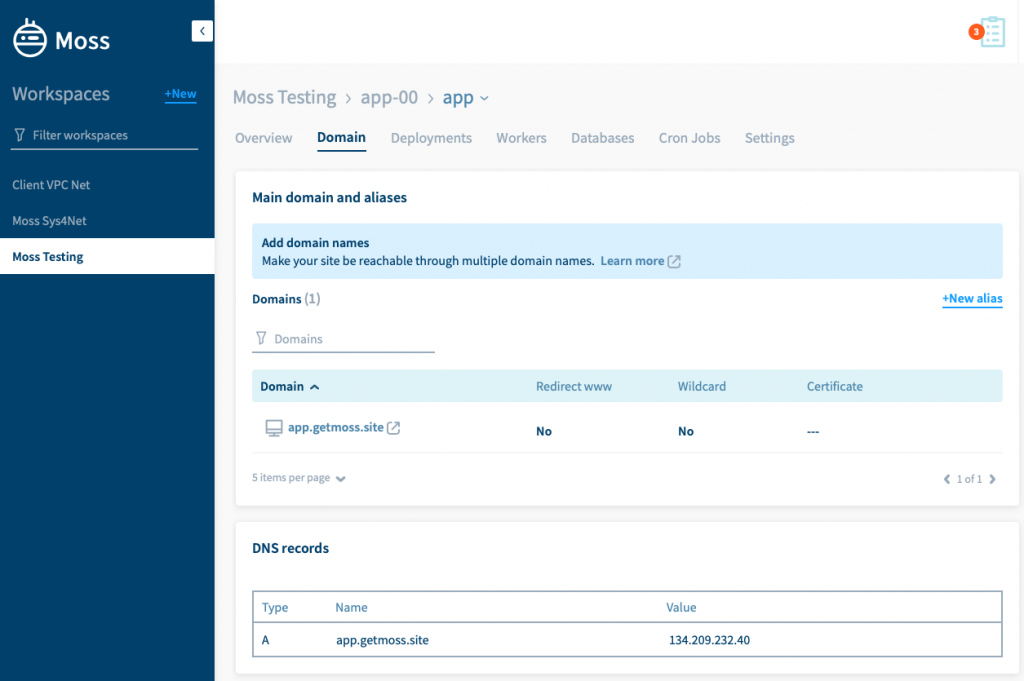
- Host: Enter the IP address of the server that hosts your website. You can easily get this from Moss, e.g. Site → Domain tab → DNS records card
- Port: leave it blank, it will use the default port (22)
- Logon Type: Normal. NOTE: Depending on your configs, this might automatically convert into Ask for password – the difference is that you’ll be prompted for the password whenever you connect to your server
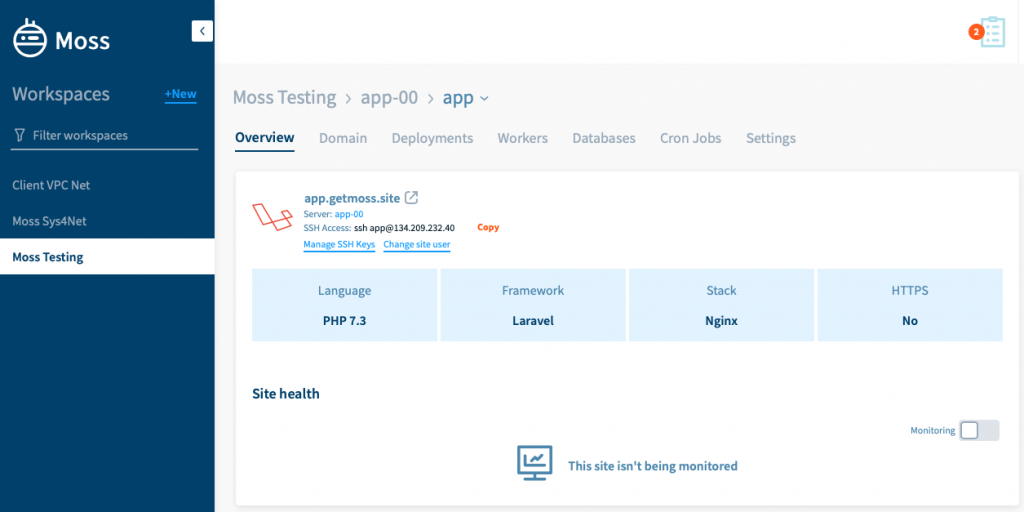
- User: Enter the server user that runs the website. You can easily get this from Moss, e.g. Site → Overview tab → SSH Access (in this screenshot the user is
app)
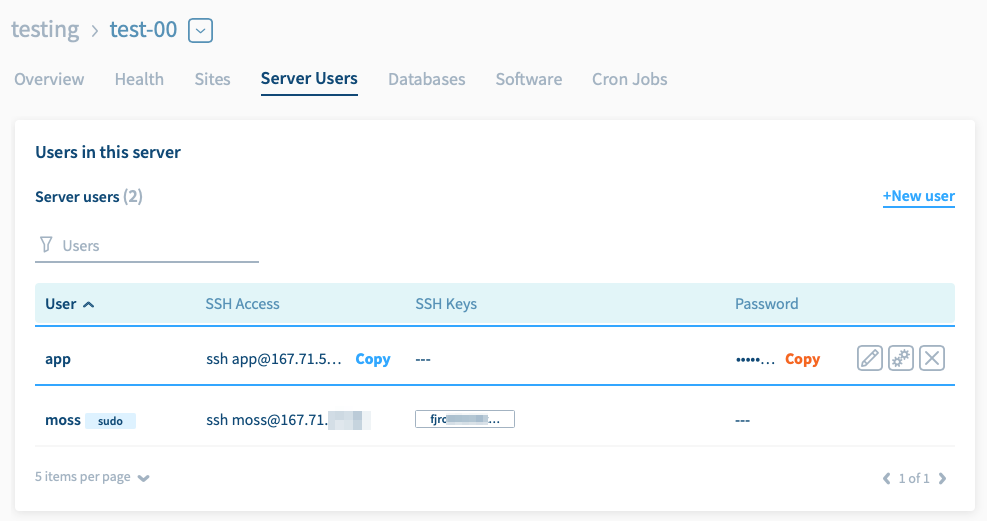
- Password: Password of the server user. You can easily get this from Moss, e.g. Server → Server Users
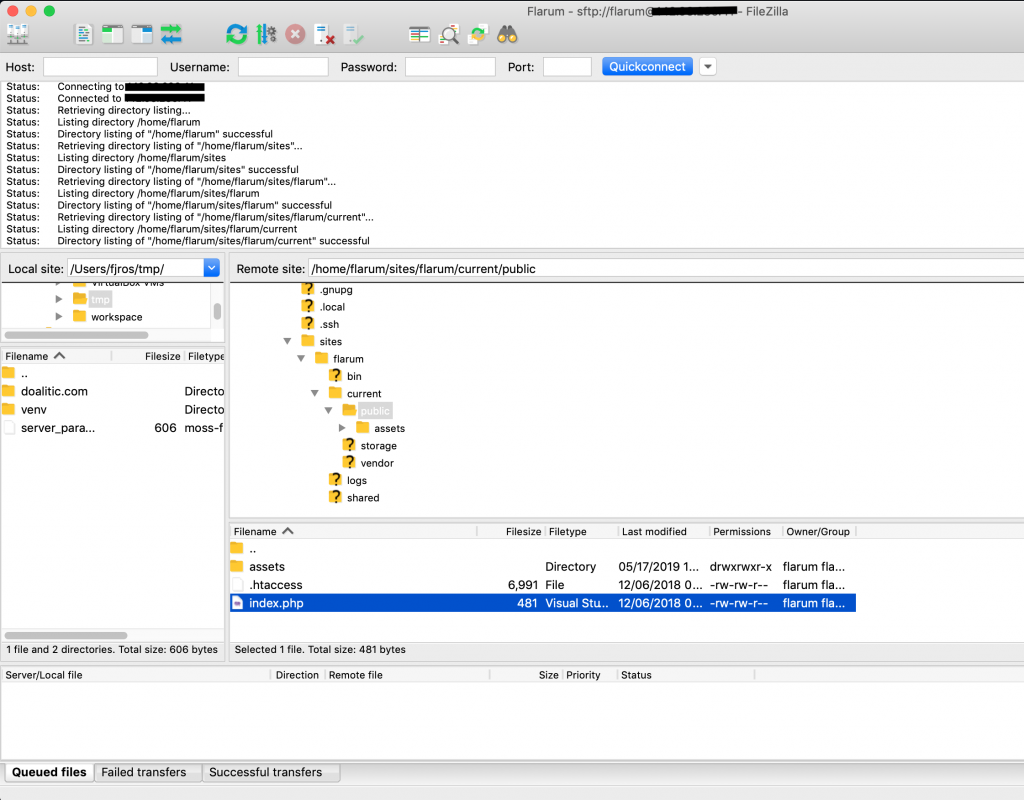
You should end up with a similar setup as the screenshot below:
Finally click Connect.
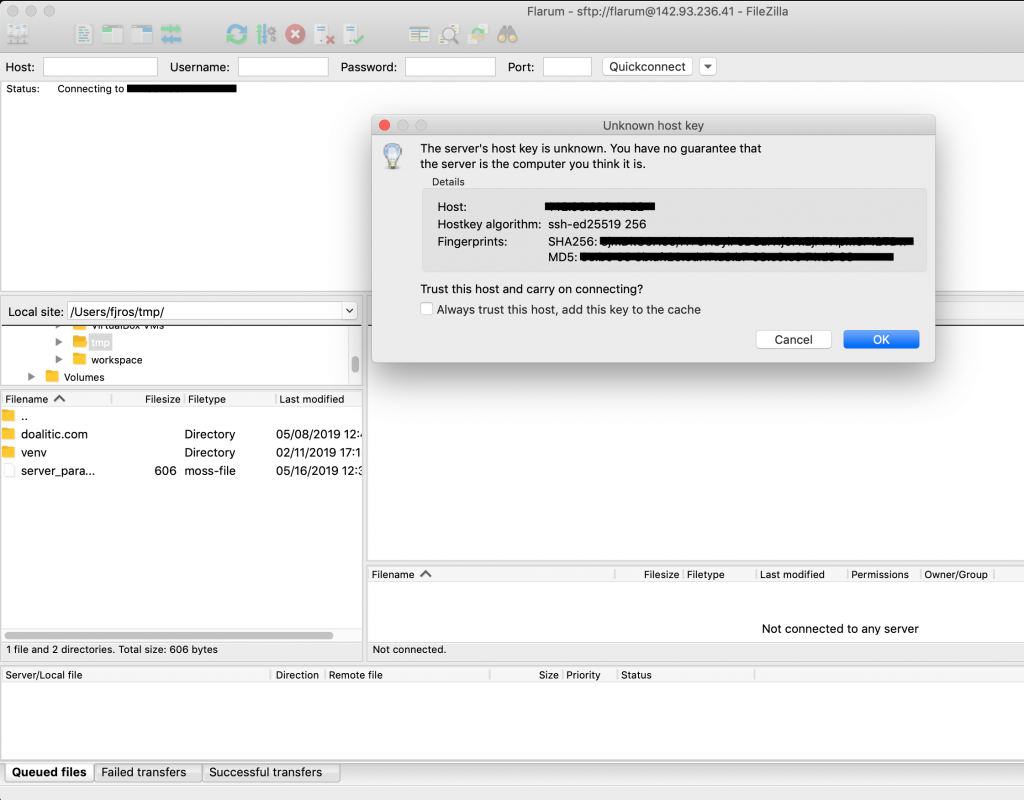
Acknowledging the server’s identity
The first time you connect to a server you must explicitly acknowledge it’s the server you really want to connect to. Click OK.
At this point you’re done 👍
Using FileZilla
You can now download and upload your website files to/from your personal computer. Moreover, you can edit and view such files locally, including your Nginx, Apache, and Deployment logs (you can find all of them under the logs folder of your site).