How to create a new Symfony application
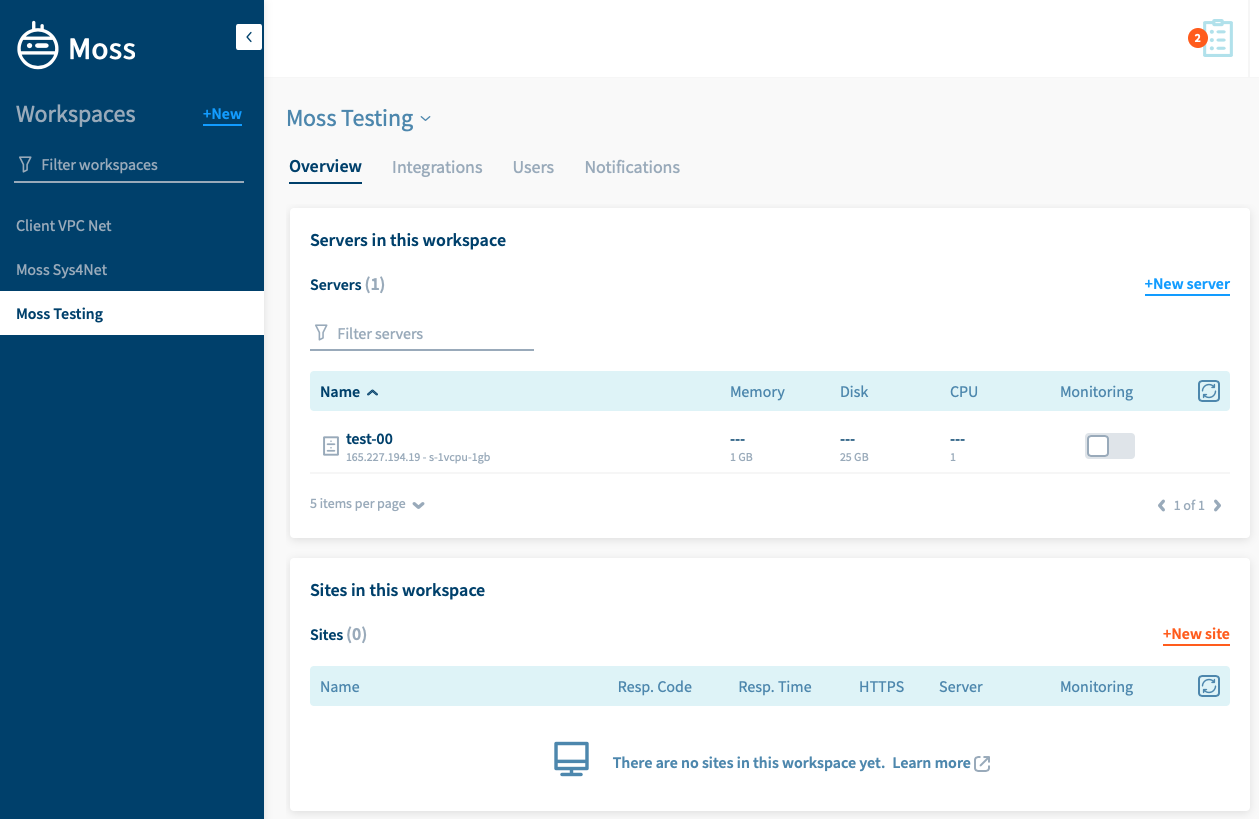
Select the workspace where your new site will belong and click New site as in the following screenshot. Alternatively, choose the server where the site will be hosted and click New site from the Sites tab.
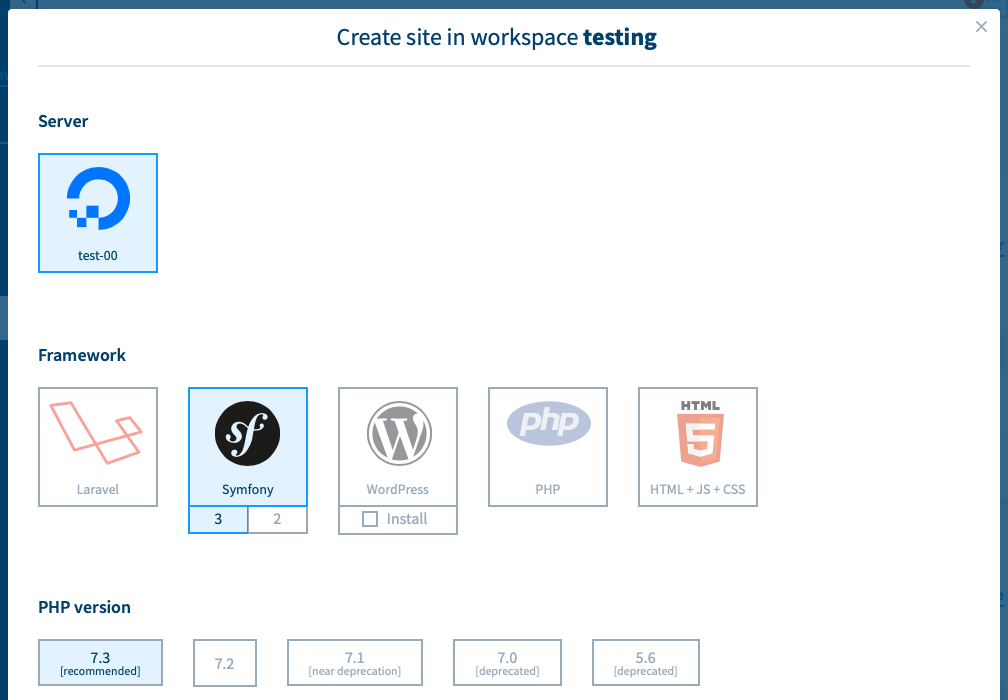
Choose Symfony as the framework. Select the version of the framework you use.
Select the PHP version you want to use in this site.
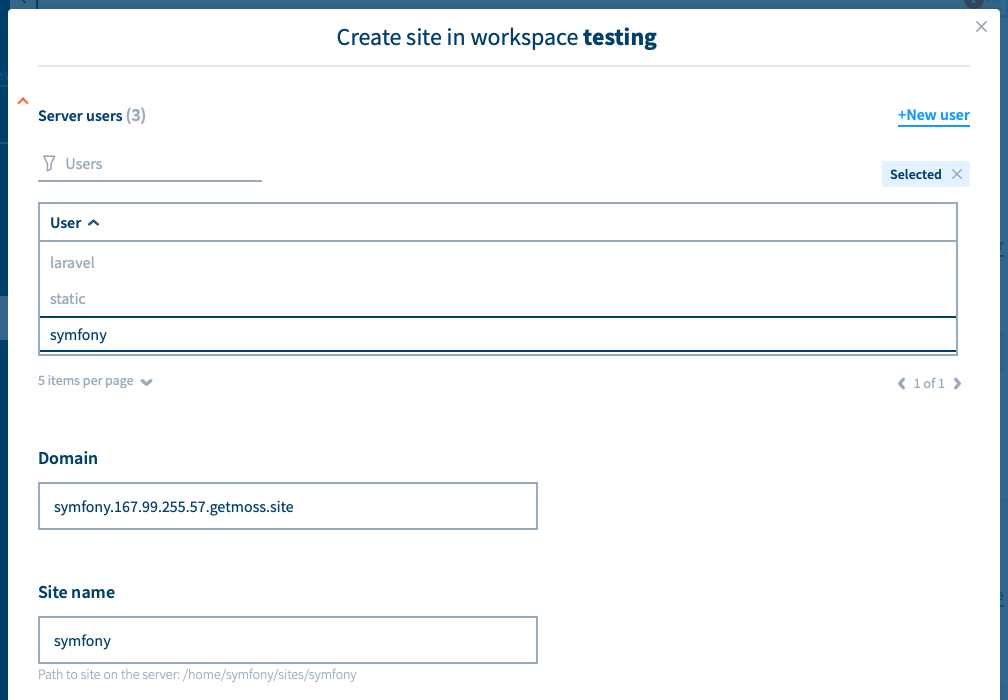
Choose the server user that will own your site. Usually you want to have a different user per site. In this way sites are isolated from each other so that they cannot access the files of the other. Hence, click New user and give it a name (or choose an existing one if needed).
Provide the domain name of your site.
Provide the site name. Such name allows you to differentiate among sites. It’ll also be used to create a path in the server where your site will be hosted. Such path is /home/<server-user>/sites/<site-name> .
Choose the certificate you want for your site:
- None: The site will only be reachable via HTTP.
- Let’s Encrypt: A new Let’s Encrypt certificate will be generated the first time you browse your new site. From then on, the certificate will be renewed automatically. Your site will be served over HTTPS (HTTP requests are automatically redirected to their HTTPS counterpart).
- Custom: You must provide a certificate and its corresponding private key. Your site will be served over HTTPS (HTTP requests are automatically redirected to their HTTPS counterpart).
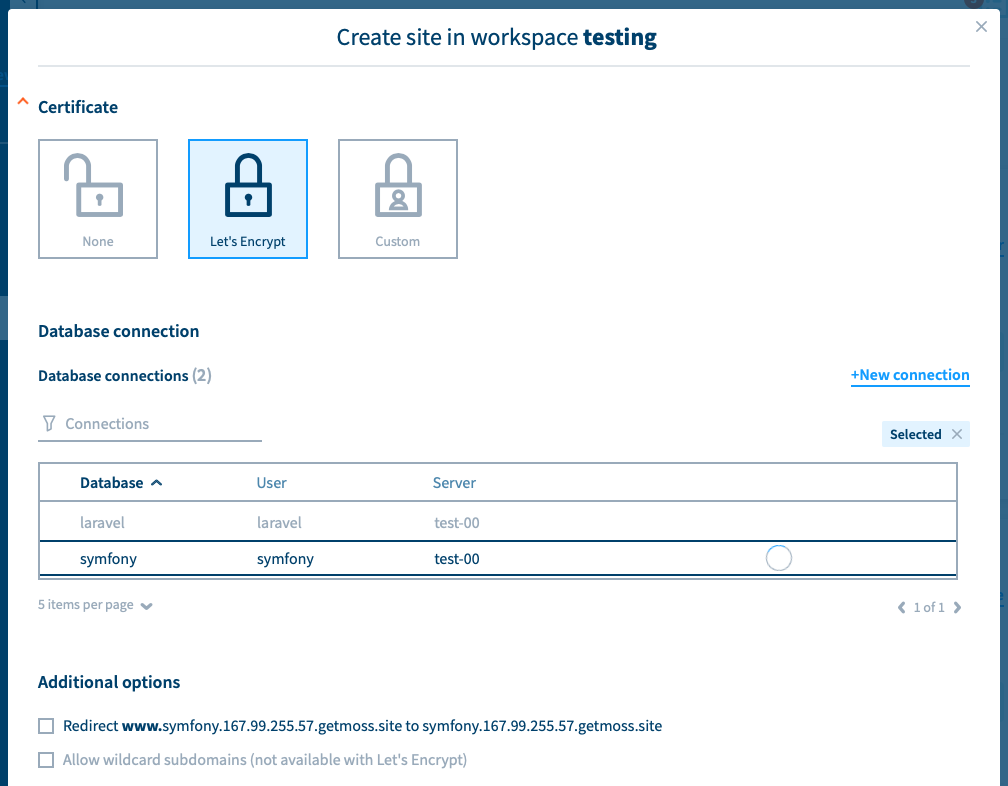
Your Symfony application will likely connect to a database. Here you can choose an existing database connection or you can create a new one (most common). If so, click New connection and provide the name of the new database, the name of the new database user, and the password for such user.
Check the additional options you’re interested in (if any):
- Redirect
www.domaintodomain - Allow wildcard subdomains
*.domain(not allowed if Let’s Encrypt is enabled)
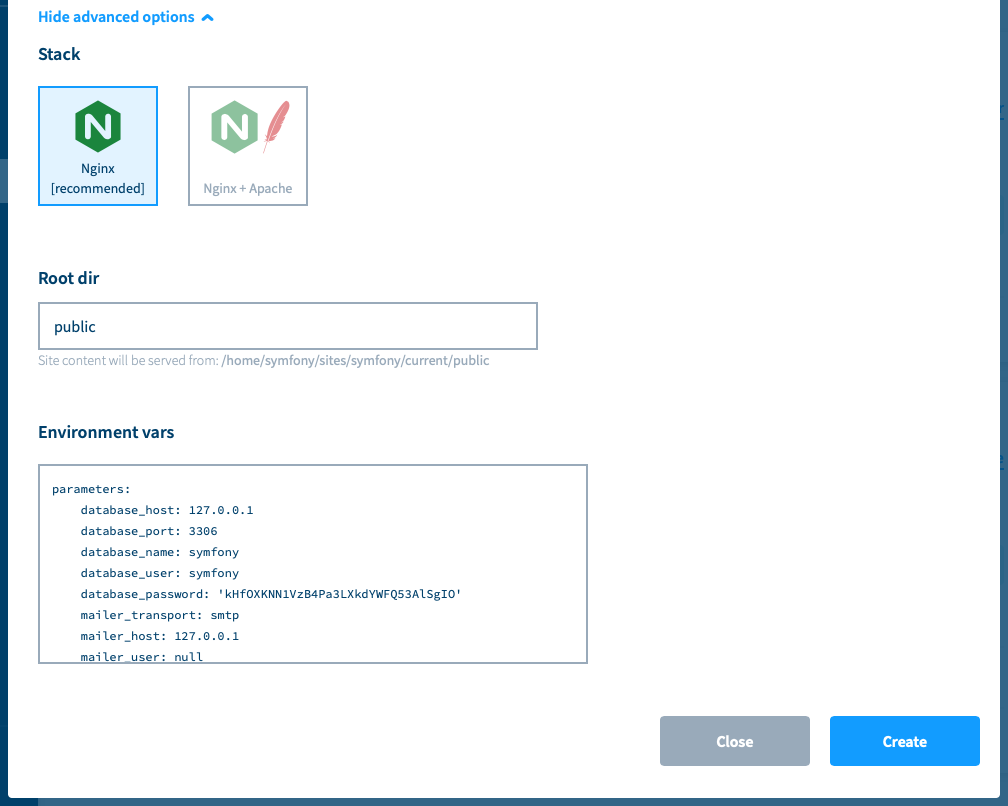
By default Moss uses Nginx for Symfony sites. If you need Nginx + Apache instead, just change your stack.
By default Moss sets the root dir of your Symfony site to its default location: public. Basically, this is the folder that contains your index.php (change this if you have a different layout).
By default Moss sets up an appropriate content for your environment vars file (parameters.yml). Edit these values if you need further customization.
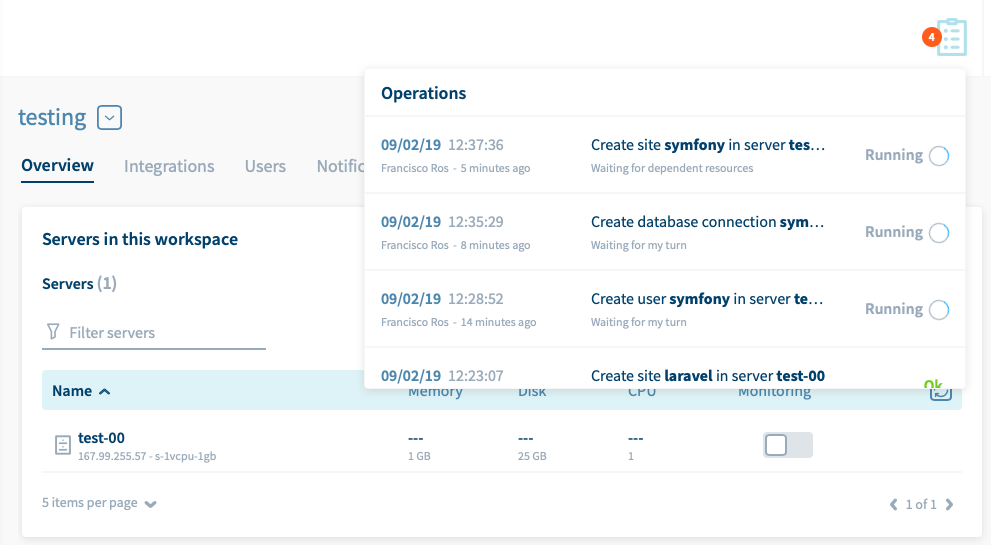
Click Create. Moss will start an operation to set up your site in the background. At this moment, you can keep adding sites or click Close to come back to the main panel of your workspace.
If you click the operations icon at the top of the screen, you should see an in-progress operation to create your site. Once it’s done, you can click Show log to check the details of such operation.
What’s next?
In order to browse your new site, now you need to:
- Update your DNS records; and
- Deploy the content of your site via git or by other means