How to securely connect to your remote database using DataGrip
You may want to manage your remote databases from your local computer using a SQL client. The approach is quite similar regardless the particular client, but in this article we’ll use JetBrain’s DataGrip.
Once you have it installed, create a new Data Source for your MySQL database. You’ll have to set it up through three different tabs.
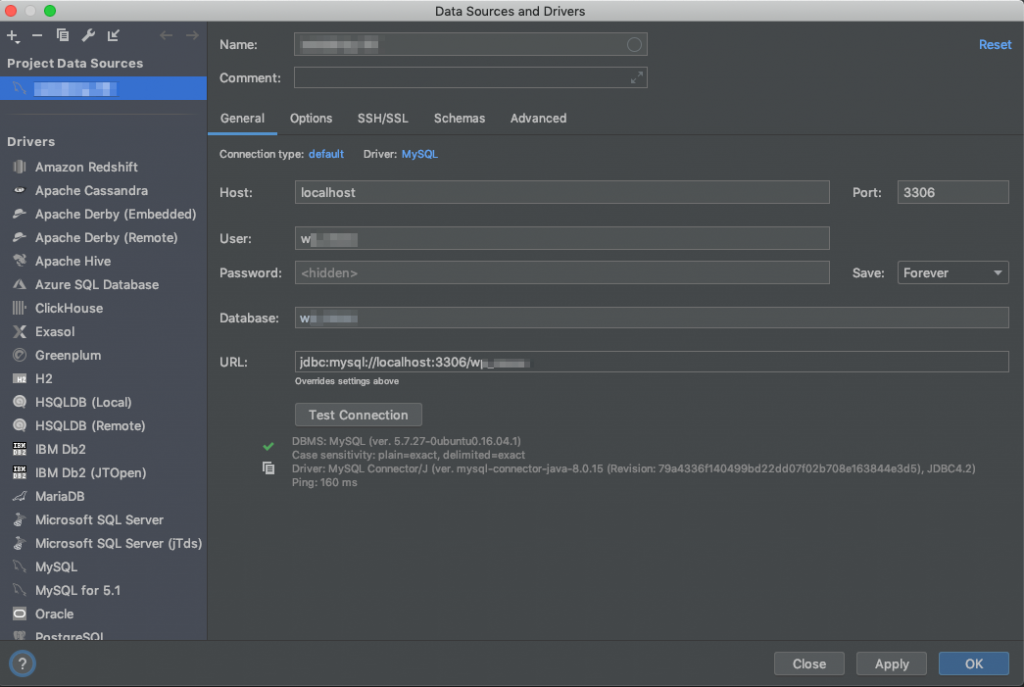
Tab “General”
Make sure your Driver is MySQL and provide the following inputs:
- Host: 127.0.0.1
- Port: 3306
- User: Your database user – you can get this from Moss: Server → Databases
- Password: Password of your database user – you can get this from Moss: Server → Databases
- Database: Name of your database – you can get this from Moss: Server → Databases
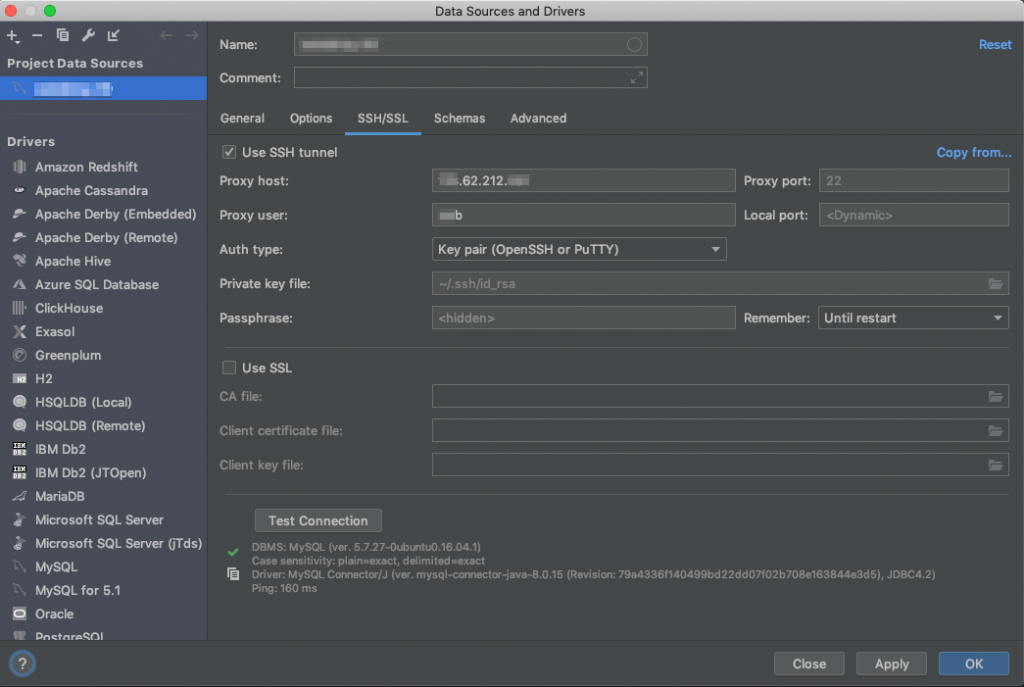
Tab “SSH/SSL”
In case you want to use SSH public key auth:
- Check Use SSH tunnel
- Proxy host: Your server’s public IP address – you can get this from Moss: Server → Overview
- Proxy port: 22
- Proxy user: The name of your server user (usually you don’t want to connect as a privileged user like
moss) – you can get this from Moss: Server → Server Users - Auth type: Key pair (OpenSSH or PuTTY)
- Private key file: Local path to the file that contains your SSH Private Key. Note that you must have uploaded the corresponding SSH Public Key on the server user above.
- Passphrase: If your SSH Private Key’s protected with a passphrase, provide it here
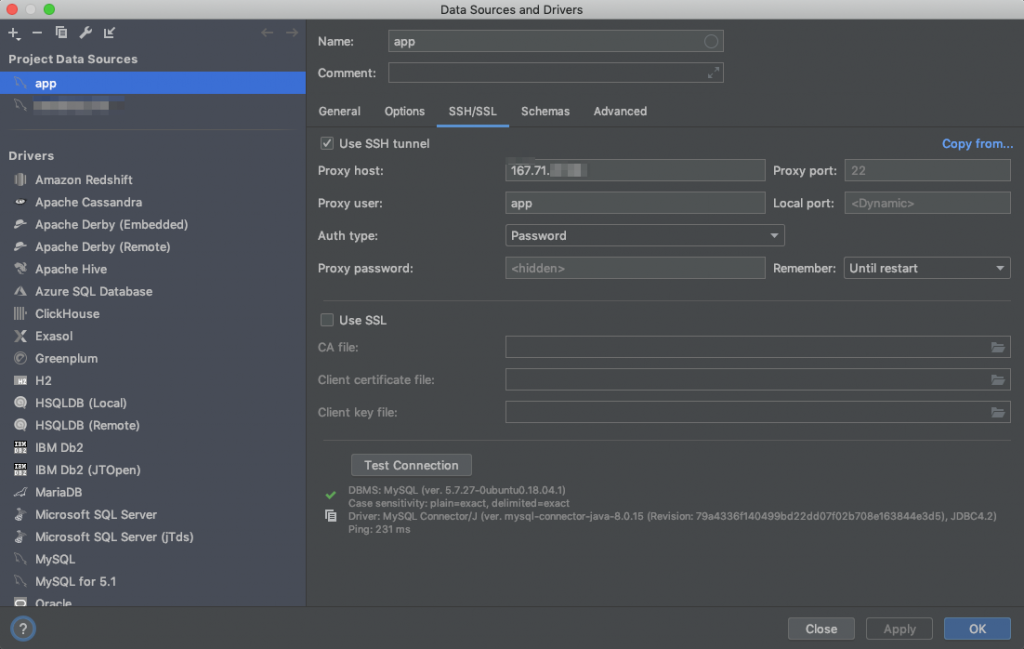
Alternatively, in case you want to use SSH password auth:
- Check Use SSH tunnel
- Proxy host: Your server’s public IP address – you can get this from Moss: Server → Overview
- Proxy port: 22
- Proxy user: The name of your server user (usually you don’t want to connect as a privileged user like moss) – you can get this from Moss: Server → Server Users
- Auth type: Password
- Proxy password: Password of the server user – you can get this from Moss: Server → Server Users
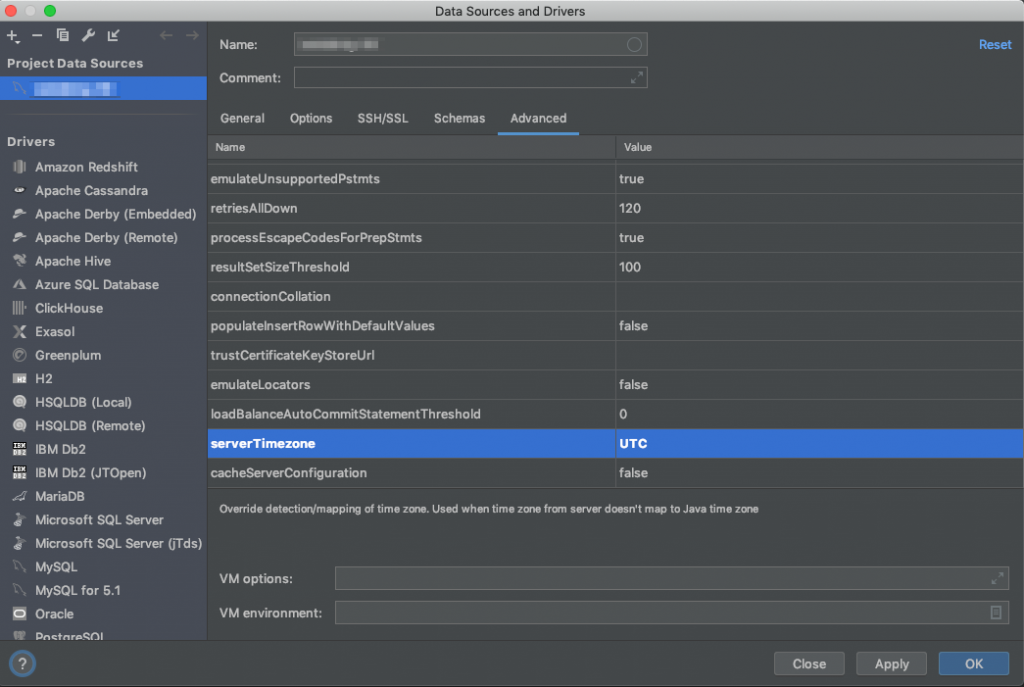
Tab “Advanced”
- serverTimezone: Provide the timezone of your server here